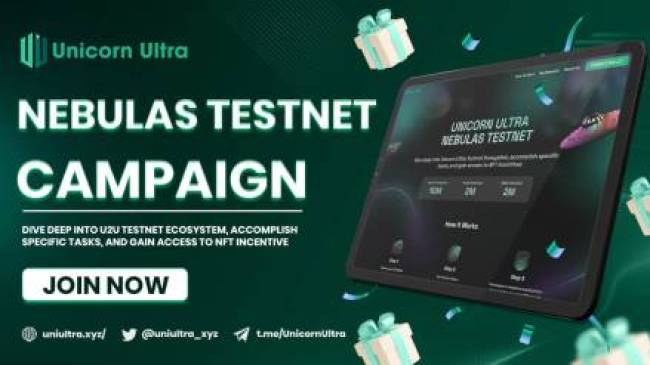
This guide will take you step by step through the whole process, giving you clear instructions, insights, and useful tips to help you get the most out of your time on the Unicorn Ultra Nebulas Testnet Campaign.
Table of Contents
Part 1: The Unicorn Ultra Nebulas Testnet Campaign - Prepare Your U2U Wallet
To set up a wallet on the U2U Testnet. Follow these steps:

Prepare Your U2U Wallet
Step 1: Visit the official Unicorn Ultra Nebulas Testnet Campaign website: https://nebulas.uniultra.xyz/
Step 2: Click the "Install now" button in the "How it works" section
Step 3: This will navigate you to the U2U wallet website. Download the U2U wallet and follow the instructions to create a strong password and write down your special mnemonic phrase to keep it safe.
Step 4: Once your wallet is all set, you're ready to start exploring!
We recommend you use the U2U Mobile Wallet version for a seamless experience
Part 2: Get Testnet Tokens
If you are using Metamask to execute our tasks, please make sure that Nebulas Testnet Network has been already added to your wallet. You can add and switch to Nebulas Testnet Network by following these steps:
Step 1: Open “Add Network" on Metamask

Add Unicorn Ultra Nebulas Testnet
Step 2: Fill in this information
Network name: Nebulas Testnet
Explorer: https://testnet.u2uscan.xyz
RPC: https://rpc-nebulas-testnet.uniultra.xyz/
ChainID: 2484
Symbol: U2U
Explorer: https://testnet.u2uscan.xyz

Add Unicorn Ultra Nebulas Testnet
Step 3: Switch network to Nebulas Testnet

Switch Unicorn Ultra Nebulas Testnet
Native Token
U2U Testnet token is a particular type of cryptocurrency used for testing purposes. In the Testnet stage, U2U Testnet coins are given away for free; any developers, builders, creators, or enthusiasts can also be obtained from online faucets. U2U Testnet coins will be invalidated on Mainnet, and they are not convertible into U2U tokens.
To receive U2U Testnet tokens from the faucet, you can claim once every hour by following these simple steps:

Get U2U Testnet Tokens
Step 1: Visit the official Unicorn Ultra Nebulas Testnet Campaign website.
Step 2: Click the "Faucet now" button in the "How it works" section. Then Click “Get testnet U2U”
Step 3: You'll be taken to the U2U faucet website.

Faucet U2U Testnet Tokens
Connect your wallet and complete the captcha verification.
Then Click "Faucet" and patiently wait for the transaction to be processed.
Ecosystem Token
Step 1: Continue with the “Faucet now” button. Click to import U2W, U2F, U2S to your wallet

Faucet
Step 2: Next, faucet U2W, U2F, U2S by clicking on “Get Ecosystem Token”. The pop-up will show up, please Confirm. 10 U2W, 10 U2F, 10 U2S have been added to your wallet.

Faucet
If you are using U2U Mobile Wallet, these tokens will be not automatically imported. You need to import them manually by following these steps:
Step 1: Click “Add token" on U2U Wallet and fill out this information:

Network: U2U Nebulas Testnet
Contract Address:
- U2W:0xb0c66BFeD7a4378efdD6E3e1feE79b4F4F4cf69A
- U2F: 0x551476fe281e7a73c38805ff47a3908e41733c0c
- U2S: 0x81d5e7b4c3c888f854ba0703bfd54e5b4a818cf6
Step 2: Click “Save" and all tokens will be displayed in your wallet
Please note: You can faucet the ecosystem token once every 24 hours
Part 4: Ultra Daily

Ultra Daily
We encourage all U2U users to check this section daily for updates on new tasks. Completing tasks not only earns your tokens but also helps you discover more about the U2U ecosystem and its vibrant community.
Day 1: Send U2W Testnet from your U2U Wallet to this address: 0x14791697260E4c9A71f18484C9f997B308e59325
Step 1: Copy the wallet address in the box
Step 2: Open your wallet and click the Send button
Step 3: Paste the wallet address on the box, choose U2W asset, input the amount of U2W token you want to send, then click “Next” and “Confirm”

Ultra Daily send U2W
Step 4: Copy your transaction ID then back to the Ultra Daily tasks, click “Complete This Task” on the Daily task, and submit the transaction hash

Ultra Daily send U2W
Part 5: Interacting with dApps and earning NFTs
Quest 1: Enter the UNIverse
Before you start interacting with our dApps, there are some tasks you need to complete. Click on "Complete This Quest" to get started.

Enter the UNIverse
On this page, you'll find the tasks required to mint Enter the UNIverse NFT.
1. Complete the required tasks

Enter the UNIverse Complete the required tasks
To meet the criteria for Task 2, Task 3, and Task 4, make sure you fulfill the requirements by joining the Unicorn Ultra Discord server, the Unicorn Ultra Telegram Group Chat, and the Unicorn Ultra Telegram Channel.
2. Mint NFT

Enter the UNIverse Mint NFT
Upon successfully finishing all the mandatory tasks in quest 1: "Enter the UNIverse," find and click the "Mint" option. Congratulations, you have successfully minted an Enter the UNIverse NFT!
You can now view your NFT under the "My Reward" section.

Check your NFT Rewards
Quest 2: U2U Wallet
1. Send U2U Testnet From Your Wallet to Another Address
To send tokens through your wallet, follow these steps:
Step 1: Copy the wallet address in the box

Copy the wallet address in the box
Step 2: Open your wallet and click on the “Send” button

Send U2U testnet
Step 3: Fill out the recipient address, and choose the asset (U2U) and amount of U2U testnet tokens. Then, click on “Next”.
Step 4: A notification will show up. Simply click on "Confirm" to proceed.
Step 5: After completing this task, please copy the transaction ID and then click "Submit" for verification on the task section.

Ultra Daily
Paste the transaction
2. Mint NFT
Upon completing all the required tasks in quest 2: U2U Wallet, click "Mint" NFT Congratulations, you've successfully minted U2U Wallet NFT!
Quest 3: U2W DEFI
Task 1: Swap any token on U2W DEFI to any other tokens
- Click on “Swap”, then you will be navigated to the Trade function on U2W Defi

Click on “Swap”
- Input the amount of token you want to swap, click “Swap” then click Confirm on the pop-up tab. Next, please Confirm on your wallet

Click Confirm on the pop-up tab
- After the transaction is submitted, go to U2UScan to copy your transaction hash then back to the U2W Defi tasks list, click “Verify” on the Swap task, and submit the transaction hash

“Verify” on the Swap task
Task 2: Add liquidity to any liquidity pool on U2W DEFI
- Click on “Add liquidity”, then you will be navigated to Liquidity on U2W Defi
- Choose the pair that you want to provide liquidity
- Click on “Add Liquidity Instead”

Add liquidity to any liquidity pool
- Input the amount of tokens you want to add then “Approve” token. You will need to “Confirm” the transaction in your wallet

“Approve” token
- Click on the “Supply” button then confirm. After the transaction is submitted, go to U2UScan to copy your transaction hash then back to the U2W Defi tasks list, click “Verify” on the Add liquidity task, and submit the transaction hash

“Supply” button then confirm
Task 3: Deposit token into Yield Farming Pool on U2W DEFI
- Click on “Farming”, then you will be navigated to Farm on U2W Defi
- Choose the LP tokens you want to farm
- Click “Enable” to approve the LP tokens to farm
- Click “Next” then Approve on your Wallet

Farming Pool on U2W DEFI
- Click on “Stake LP” to farm your LP token
- Input the amount of token you want to deposit then click “Confirm”. Then, confirm on your wallet.
- After the transaction is submitted, go to U2UScan to copy your transaction hash then back to the U2W Defi tasks list, click “Verify” on the Farming task, and submit the transaction hash

Click on “Stake LP” to farm
Task 4: Stake token on U2W DEFI
- Click on “Stake”, then you will be navigated to Stake on U2W Defi
- Click on the token U2W then click Enable the pool and Next on your wallet

Stake token on U2W DEFI
- Click on the “Stake” button
- Input the amount of token you want to stake then “Confirm”

Input the amount of token you want to stake then “Confirm”
- Then, Confirm on your wallet. After the transaction is submitted, go to U2UScan to copy your transaction hash then back to the U2W Defi tasks list, click “Verify” on the Stake task, and submit the transaction hash.

click “Verify” on the Stake task
Task 5: Mint NFT
Upon completing all the required tasks in Quest 3: U2W Defi, click "Mint" NFT Congratulations, you've successfully minted a U2W Defi NFT!
Quest 4: U2 NFT
1. Buy an NFT

Buy an NFT
Step 1: Go to the U2NFT website and connect your wallet
Step 2: Tap on “Explore” to browse through the various NFT collections available on the platform.
Step 3: After you have found an NFT that you want to purchase, click on "Buy Now" to begin the buying process.
Step 4: To complete the purchase, click on "Confirm" and wait for the transaction to be processed. Congratulations! You have successfully bought an NFT.
Note: To check out your newest NFT: After a few seconds, your brand new NFT should be visible in your collection. Head over to your U2NFT profile and find your new NFT under the "Collected" section.
After completing this task, please copy the transaction ID and then click "Submit" for verification.

List an NFT for sale
Step 1: To sell an NFT on U2NFT, click on Account at the top right of the page and then select "Profile".
Step 2: Once you are on the item page of the NFT that you want to sell, click on "Sell" located on the top right of the page. Enter the price at which you want to sell your NFT, and click "Sell".
Step 3: To finalize the process of selling your NFT, click on "Confirm". Congratulations! Your NFT has been listed for sale on U2NFT.
After completing this task, please copy the transaction ID and then click "Submit" for verification.
3. Mint NFT
Upon completing all the required tasks in Quest 4: U2 NFT, click "Mint". Congratulations, you've successfully minted a U2 NFT NFT reward!
Quest 5: U2U Tool

Multi-sende tool
Step 1: In the left-hand menu, click on " Multi Sender"
Step 2: Enter token and recipient addresses along with corresponding amounts, send at least 2 people then click "Next."

Enter token and recipient addresses along with corresponding amounts
Step 3: Select the desired network speed and review the list of recipients and amounts to ensure accuracy. Click "Next" to proceed.
Step 4: Congratulations! You have successfully executed a transaction using the multi-sender tool.
After completing this task, please copy the transaction ID and then click "Submit" for verification.
2. Create Token

Create Token
Step 1: In the left-hand menu, click on "Create Token."
Step 2: Complete all fields for token name, symbol, and initial supply, then click on "Create."
Step 3: You have now successfully created a token on the U2U Chain.
After completing this task, please copy the transaction ID and then click "Submit" for verification.
3. Mint NFT
Upon completing all the required tasks in quest 5: U2U Tool, click "Mint" Congratulations, you've successfully minted an U2U Tool NFT!
After completing all quests, remember to check all your NFTs in the "My Reward" section.
Conclusion
The Unicorn Ultra Nebulas Testnet Campaign offers a safe space for developers, users, and enthusiasts to try decentralized apps (dApps) and earn special NFT rewards. This guide provides step-by-step instructions to help you make the most of your experience.
Once you've explored the Unicorn Ultra Nebulas Testnet Campaign, please share your thoughts with us on the Discord support channel. Your feedback holds significant value to us.
As the testnet progresses and new dApps are introduced, we'll consistently update this guide. This way, we ensure it remains a comprehensive and current resource for users navigating the ever-expanding Unicorn Ultra ecosystem.
Stay updated on the Unicorn Ultra Nebulas Testnet Campaign through social media and community channels on Telegram and Discord.
Get the latest updates here: Blog | Twitter | Telegram | U2U Council